This is a STEP-by-STEP post, no-nonsense approach to simulating an Arduino on your PC, for those who don’t have the actual Arduino hardware, but have the following Required Software:
- Arduino [Free] Download from http://arduino.cc
- Proteus [NOT-Free] (I am assuming you have a licensed version from school or something (google maybe)
From here on, I will be simply providing the steps of the process, no talk about what and how, just the steps, follow them and you will hopefully be able to see simulation of arduino code within your PC.
- Open Arduino Software
— Select Arduino Uno from Tools(menu)>>Boards
— Select Preferences from File Menu
— Check the compilation box after the Show verbose output during: - Write your program in Arduino, anything, or simply open some example program.
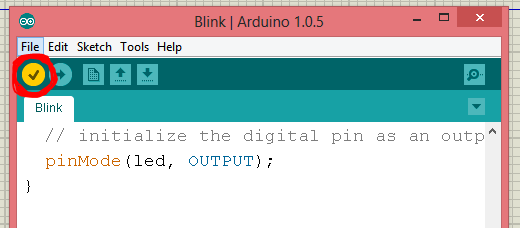
- Once done with the code, CLICK ON VERIFY,
the RIGHT/check button on top-left – do not click on Upload, cause you don’t have the Arduino connected. - As the arduino IDE verifies and compiles your code, you will see the output of the compilation process as it happens,
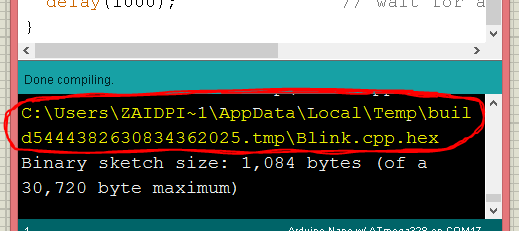
once done, it will show something like this at the bottom LOG window (black area).
C:\Users\ZAIDPI~1\AppData\Local\Temp\build3564184540682511069.tmp\Blink.cpp.hex

Binary sketch size: 1,084 bytes (of a 32,256 byte maximum) - I have only shown the last few lines,
Copy the PATH of the hex file, complete path from the drive root to .hex
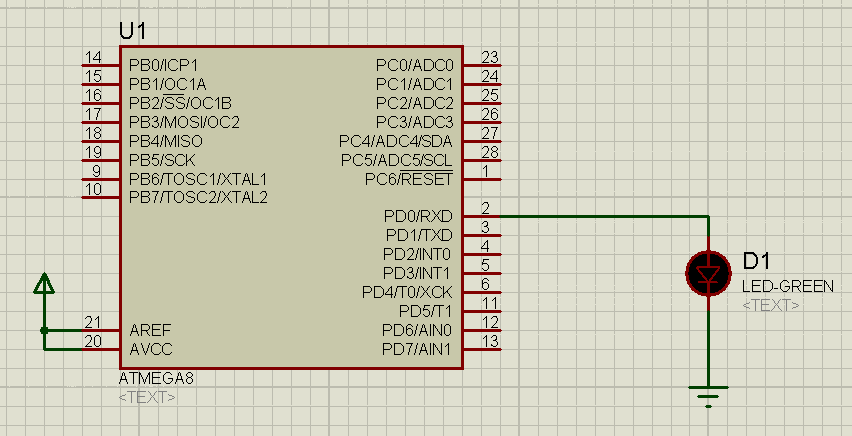
C:\Users\ZAIDPI~1\AppData\Local\Temp\build3564184540682511069.tmp\Blink.cpp.hexThe arduino Part is DONE, now we move to Proteus. - Open Proteus (ISIS) and add an ATMega328P into the Editing Window of Proteus.
[press P for Part, search for ATMega328P and then add it, first to library then to the editing area, place part] - Add Power to the AVCC and AREF by attaching them to 5V/VCC/Power Rail
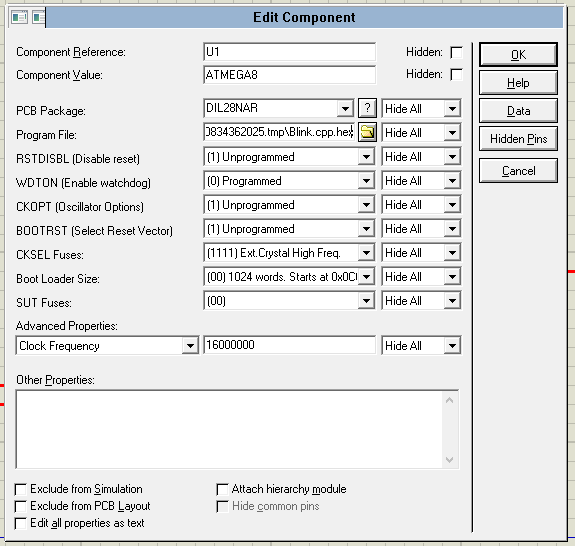
- Now double click on ATMega328P to open the properties page, do the followign changes:
— Set the CLKDIV8 option to (1) Unprogrammed
— Set the CKSEL Fuses option to (1111) Ext. Crystal 8.0-MHz
— in Advanced Properties section, write in 16000000 as the value of Clock Frequency Property
— PASTE the address of HEX file, previously copied from Arduino software in the Program File option.
Press OK, to close the properties window - ADD any circuit, components etc in Proteus as you would with the actual ARDUINO
- PRESS PLAY
- Now, whenever you change code in arduino, just click on VERIFY to re-compile it, the hex file will remain the same and you can simply test the new code by stopping and re-starting the proteus simulation.


